
At work, I’m gradually moving our CI server from Hudson to TeamCity.
Nothing against Hudson really, but I feel that TeamCity is a much more robust CI Server when it comes to integrating with .Net. It allows you to publish artifacts from your builds, and has a killer integration between developers IDE’s and itself, which is amazingly helpful to help developrs make sure they’re not going to break the build… well before they break it.
But anyway, one thing that was slightly annoying me with TeamCity, is the fact that the build agents would often get disconnect, and all my builds would stay in a queue until I went and manually restarted the agents.
The “Build Agent Disconnected” quickly became very annoying, and by quickly looking up on Google, I found lots of people had the same issue, and while there were lots of responses or people claiming they found a solution to it, I never actually found anything of much use other than the screenshot this guy posted.
When you add build agents on TeamCity, you get the option of adding them as a windows service, or simply as an agent that runs with TeamCity. I had tried to add multiple build agents as windows services before, but for a very strange reason, I would always end up with only one agent no matter what I did. TeamCity’s documentation wasn’t much help to be honest, and I ended up figuring this out after a couple of hours of trial and error. So here’s how you do it properly.
Installing
Download
Get the latest version of the MS Windows Installer at http://your_local_teamcity_url/update/agentInstaller.exe from within the build server
Install
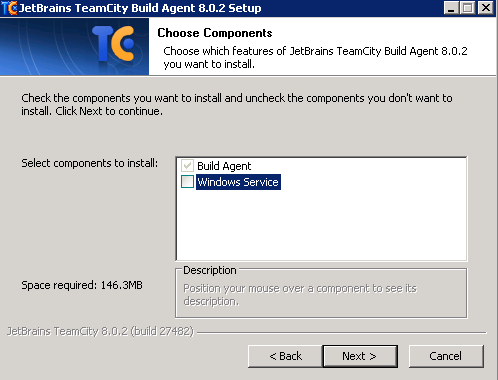
Run agentInstaller.exe and when the Choose Components screen is displayed, deselect “Windows Service” - I’ll explain this later
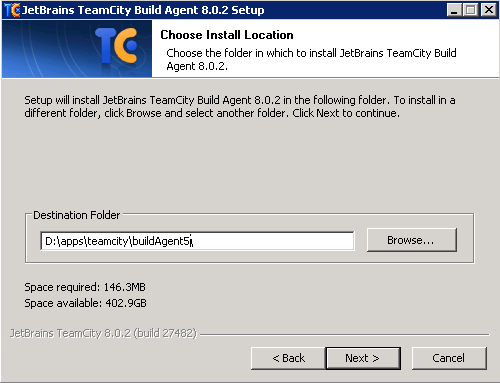
Choose a location where you would like to install
Team City as of the current version is not particularly smart about suggesting a location, and will always suggest the location of an existing Agent, which will then overwrite your agent and mess things up. So make sure you chose one that doesn’t already exist
Configure
The following screen will then be shown once the installation is completed
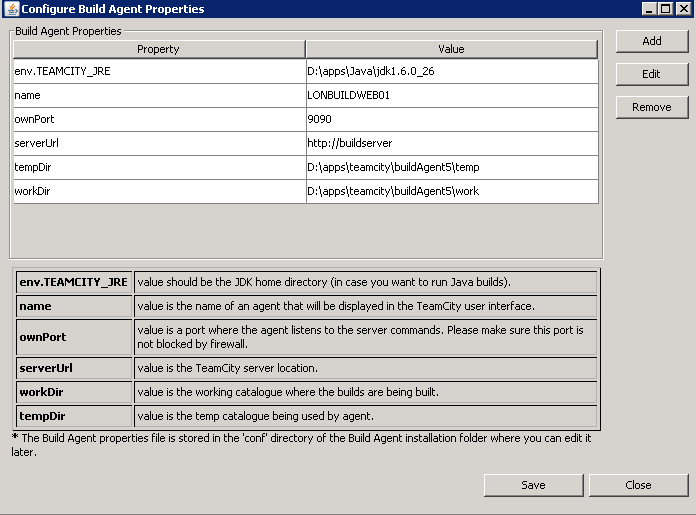
Configure it as follows:
env.TEAMCITY_JRE: The location where your JRE is installed. Team city comes with its own, so you can use that. It will normally be under the team city installation folder in a folder called JRE (i.e. D:\apps\teamcity\jre)name: This gets pre filled with the server name. Try and come up with something sequential that matches your installation directory (i.e. Build Agent 5). Spaces are cool hereownPort: This is the port for your agent. it’s important that each agent has a port and that the port is actually open. Anything above 9090 will be good. So suggest using 909{agent_number}. Where agent_number is the number of the agent you’re installing. in this example our port would be 9095serverUrl: this is the URL for your build server. It should also include any ports in it in case your build server is configured at a specific port (i.e. http://your_local_teamcity_url:port_if_any)tempDir: you can leave that as defaultworkDir: you can leave that as default
Adding your new agent as a windows service
Preparation - Here is the trick
Edit the file wrapper.conf that has been created on the folder where you have installed your agent. In our example, it would be under D:\apps\teamcity\buildAgent5\launcher\conf
In that file, scroll all the way down and find:
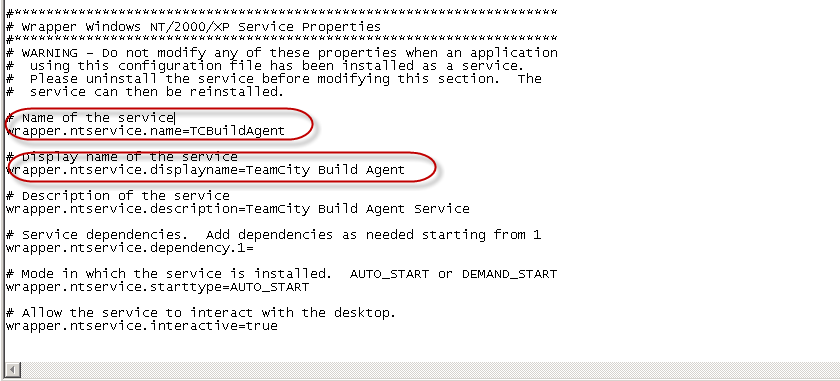
These will need to be updated so when you install this as a service, so you aren’t overwriting an existing service you may already have.

For consistency we have named it after our initial configuration by appending the number 5 to both values.
Installation
From command prompt, go to the bin folder in your agent (D:\apps\teamcity\buildAgent5\bin in our case) and run the following:
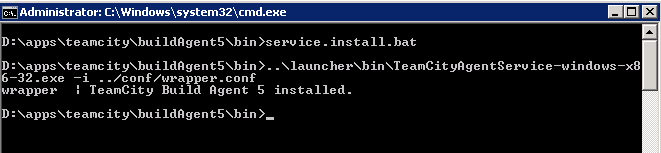
Verify that your service has been installed:

Start it, and it should now appear as an active Build Agent in TeamCity agents
